
Marilyn Monroe said it best, or should I say, sang it best..."Diamonds are a girl's best friend."
Wearing jewelry has got to be one of the best ways to glamourize an outfit. I mean, think about the red carpet: the stars are dressed to nines. Everybody asks them what they're wearing and, of course, they talk about the dress, the shoes, the bag and the JEWELRY. What better way to make a statement than to wear a bazillion-carat ring or cascading diamond earrings?
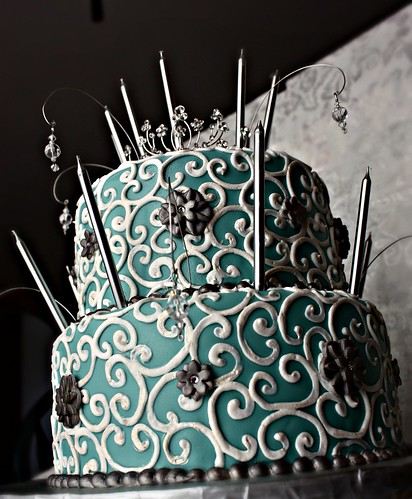
And when it comes to cakes, a little bit of sparkle can turn even the simplest cake into a show-stopping centerpiece. Surprisingly enough, I learned how to make cake jewelry from watching the Food Network. I was watching the Ace of Cakes episode, "Wedding Bells and Shotgun Shells." They were making a wedding cake for Sherri, one of the cake decorators at Charm City Cakes. Duff and his staff were stringing crystal beads through some fishing line and hung them on wire supports to stick into the cake. I must've watched that episode hundreds of times just so I could figure out how to make them. Thank goodness for DVR! After a couple of tries, I finally got it.
Let's get started...
Here's what you'll need:
- swarovski crystals nd glass beads
- fishing line
- needle-nose pliers
- wire cutters
- 18-gauge stem wire
- florist tape
- fishing line
- needle-nose pliers
- wire cutters
- 18-gauge stem wire
- florist tape
1. Cut a piece of fishing line, about 4 inches or so, and string the first bead through.

2. Bring the two ends of fishing line together and string the second bead through both ends.

3. String the rest of the beads through.

4. Tie a knot at the end of the fishing line, but leave enough space on top to loop the wire through later.

5. Cut the wire to the desired length. Use needle-nose pliers to bend a loop at the end of the wire.

6. You can leave the wire straight or give it a curve.

7. Loop the fishing line through the end of the wire.

8. Wrap florist tape around the wire before sticking it into the cake.
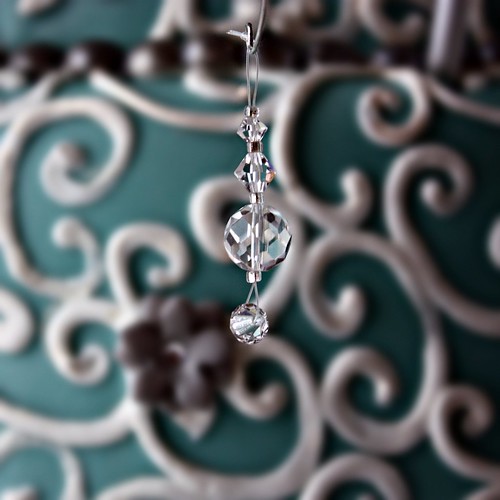
Here's the finished product:
13 comments:
So pretty! That will make every cake even more special!!
Those are so beautiful! THANK YOU for taking the time to not only share the details of how to make these, but for posting pictures of the entire process! I am trying to learn some of the different elements of cake decorating on my own and there are not a lot of blogs out there with so much detail (but I love them just the same for the constant inspiration). You rock!
ohh! i can't wait for you next project! i will always your work and your ability to share your talent!
God will give you more and I don't doubt it at all. =)
GORGEOUS!!! Love the cake and all the details!
where did you get the Candles
Thanks everyone :-)
Anonymous - I bought the candles at Party City.
Is floral tape food safe?
Most cake decorators use floral tape to cover the wires on gumpaste flowers, so I implicitly assumed it's food safe. I've tried wrapping the wires in aluminum foil and plastic wrap. That also works but it tends to be a little bulky.
Many of us put wire (wrapped or bare) inside of straws inserted into the cake to protect the cake from direct contact with wire or floral tape. :)
Your cake jewelry is beautiful! There is a real art to stringing beadwork. Lovely! :)
This cake is BEAUTIFUL!! This will be my daughters sweet 16 cake. I have searched all over the web for these candles and can't find them, HELP please.
I bought them at Party City. They're called silver mini taper candles and they're $2.49 for a pack of 12. You can order them online I think. Just look under "cake candles" in the "birthday parties" section.
AMAZING job on this! I found your post here while googling "cake jewels" and this is exactly what I needed to get started on our wedding cake! THANKS!
Your tutorial is an awesome inspiration! This is also a great idea. Many thanks for sharing. I would like to feature it at http://www.handmade-jewelry-club.com/
Contact me here if you have a concern.
Jane
http://diylessons.org/
Post a Comment