
What I love about making cakes for friends and family is that I get to be unabashedly creative. It's very liberating and I think I do my best work when I'm free to make whatever cake I dream up in my head. Luckily, I find inspiration from everything around me. I could be flipping through a fashion magazine and be fascinated by a pretty print on a dress. I might be watching a movie and be captivated by the colorful scenery. I may even find inspiration from looking at a wrought iron balcony. Once I've got an idea to go with, I just pull out my sketchbook and start drawing. Sometimes I'll draw because I'm brainstorming for a cake project and sometimes I just draw for the fun of it.
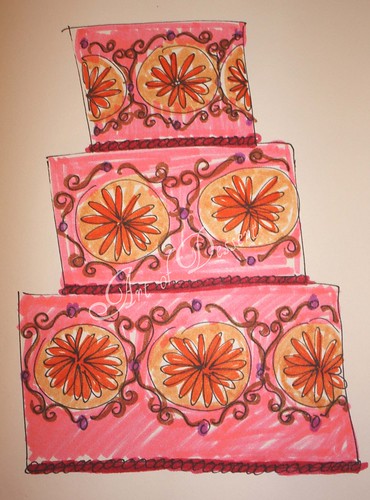
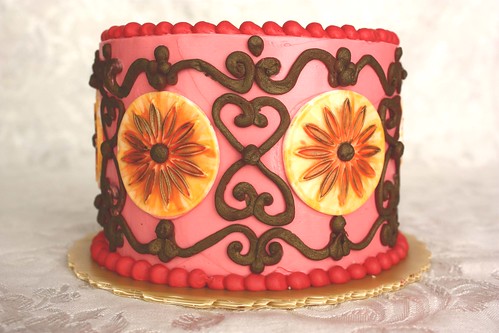
This particular cake was from a sketch I was doing for fun. I was just playing around with a whimsical pattern I made and colored it red, pink, orange and brown to give it an exotic feel. I imagined it would be a gorgeous wedding cake for couple or even a fabulous sweet sixteen birthday cake for a very lucky girl. Well, I decided to make a scaled down version for my cousin Macie. Lucky girl :-)
I used my hybrid buttercream frosting to cover the cake and pipe the borders. People always asked me how I get the sides to be so smooth. When I was learning how to frost cakes at school, I had trouble making the sides smooth too. No matter how steady I hold my off-set spatula, I could never get it to be perfect. But while I was working at a bakery, I discovered a really handy tool called a smoothing and decorating comb
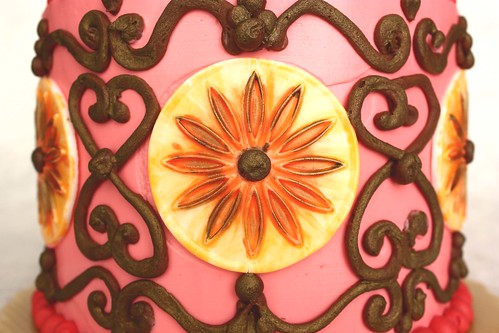
To make the flower medallions, I used rolled fondant, a round cookie cutter and a cookie stamp. I used yellow and orange food color to paint the fondant. Then I piped chocolate ganache in the center and lightly brush it with gold luster dust. I did the same thing on the petals.

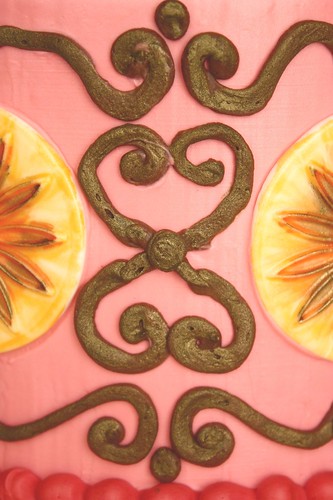
I also used chocolate ganache to pipe the scrollwork pattern on the sides. After I let the ganache firm up in the fridge, I brushed over it with a little bit of gold luster dust.
I repeated the scrollwork pattern on top of the cake. For the plaque, I use rolled fondant and a round cookie cutter. I wrote the birthday greeting with a black food color pen and finished the plaque by piping chocolate ganache around the border.
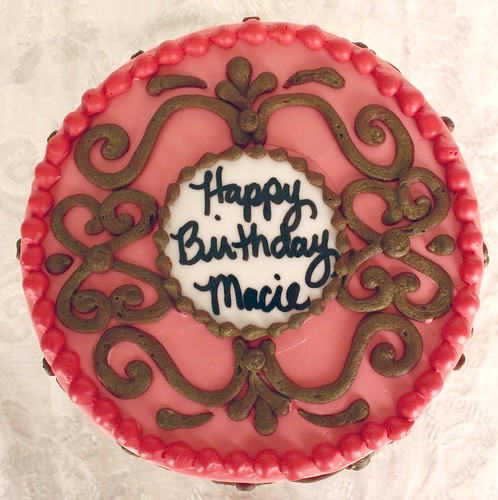
I was very pleased with how the finished cake turned out. It actually looked even better than my sketch. And most importantly, my cousin loved it :-)

¡Oh! Muy, muy agradable.
ReplyDeleteVery creative indeed, thank you for sharing ;)
ReplyDeleteIt is beautiful! Thank you for sharing your passions and talents! I'm sure it tastes as delicious as it looks!
ReplyDeleteoh this looks lovely, I love the colours. Thanks for sharing your tips.
ReplyDeletetruly beautiful. i love it! thank you for the great post!
ReplyDeletethis looks so elegant !! well done! love it!
ReplyDeleteBeautiful cake!!
ReplyDeleteThat looks too nice to eat, though ;)
ReplyDelete